> For the complete documentation index, see [llms.txt](https://guide.swiftxr.io/llms.txt). Markdown versions of documentation pages are available by appending `.md` to page URLs; this page is available as [Markdown](https://guide.swiftxr.io/plugins/blender/version-4.2-or-above.md).
# Version 4.2 or Above
[Download Add-on](https://github.com/swiftXR/swiftxr-blender-plugin/archive/refs/tags/1.0.3-patch.zip)
### Introduction
SwiftXR is a powerful platform for creating and sharing interactive 3D, augmented reality (AR), and virtual reality (VR) experiences on the web. With the SwiftXR (3D/AR/VR) Add-On for Blender, you can easily export your 3D scenes and models directly into the SwiftXR platform, enabling you to showcase your work to clients and colleagues in an immersive, interactive format.
### Installing the Add-On
To get started, download the SwiftXR (3D/AR/VR) Add-On for Blender from [here](https://github.com/swiftXR/swiftxr-blender-plugin/archive/refs/tags/1.0.3-patch.zip). Once you've downloaded the Add-On, open Blender and navigate to Edit > Preferences > Add-ons. Click on the "Install" button and select the swiftxr-blender-plugin-x.x.x.zip file.
### Setting up your API Key
To generate an API key, you'll first need to create a SwiftXR account (if you don't have one already). Once you've created your account, navigate to the [SwiftXR Settings](https://swiftxr.io/hub/account) page and click the "Create API Key" button to generate a new API key. Copy the API key and input it into the SwiftXR Exporter Blender preference.
### Setup Up your SwiftXR Domain
In your [SwiftXR Settings](https://swiftxr.io/hub/account), configure your custom domain to ensure seamless access to your projects. Once set up, your projects will be available at: `.swiftxr.site/`
This step simplifies sharing and improves accessibility for your immersive experiences!
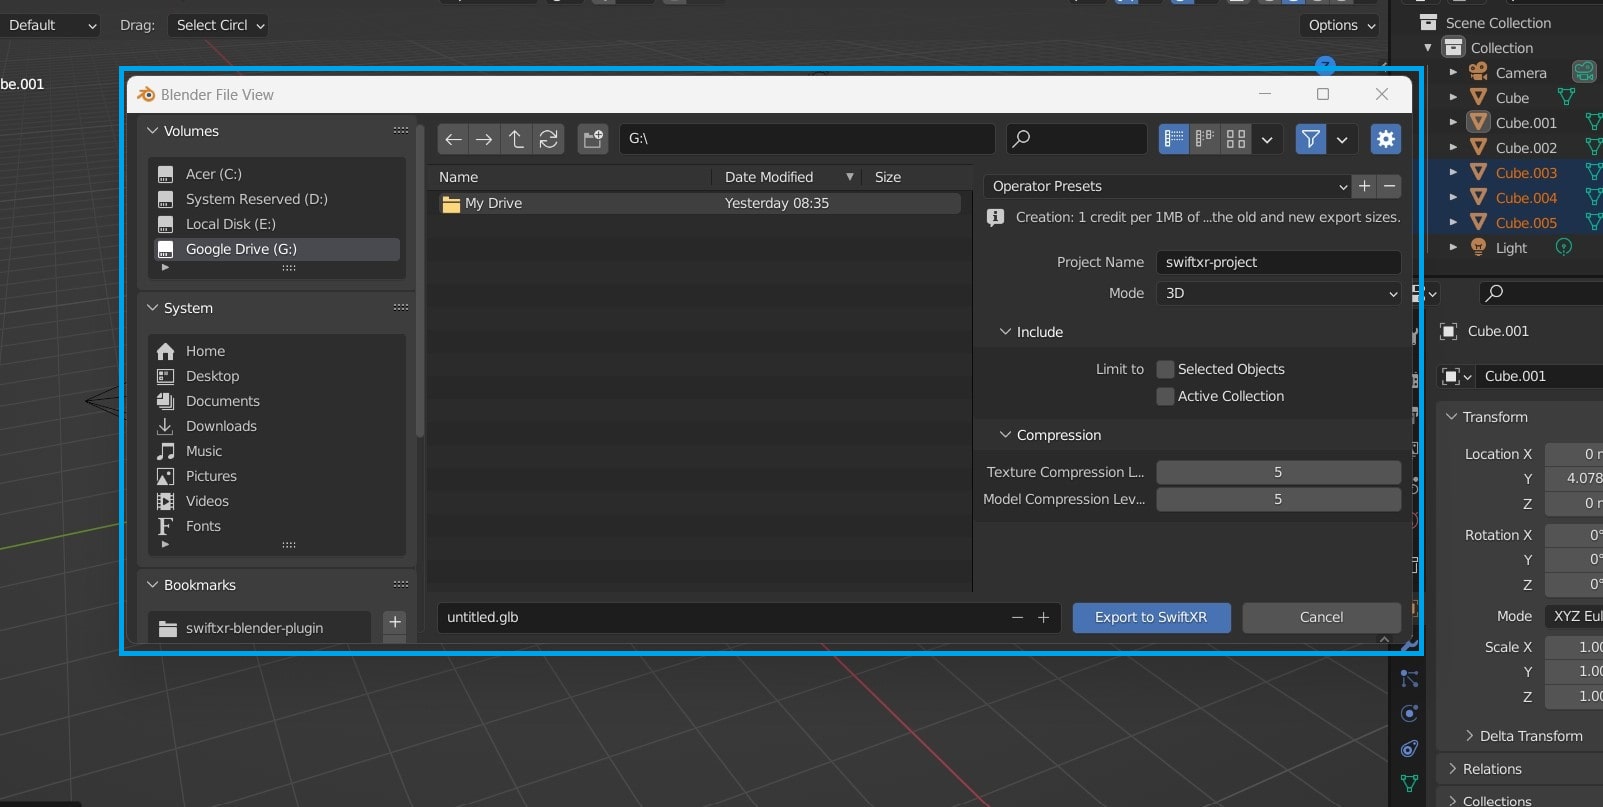
### Exporting your Scene
After you've created your 3D scene in Blender, it's time to export it for use in SwiftXR. Click on File > Export > SwiftXR (3D/AR/VR) Viewer to bring up the SwiftXR Exporter options. Here, you can specify the project name (which will be used to generate the website URL), the export mode (3D or AR), the assets to include, and the compression level.
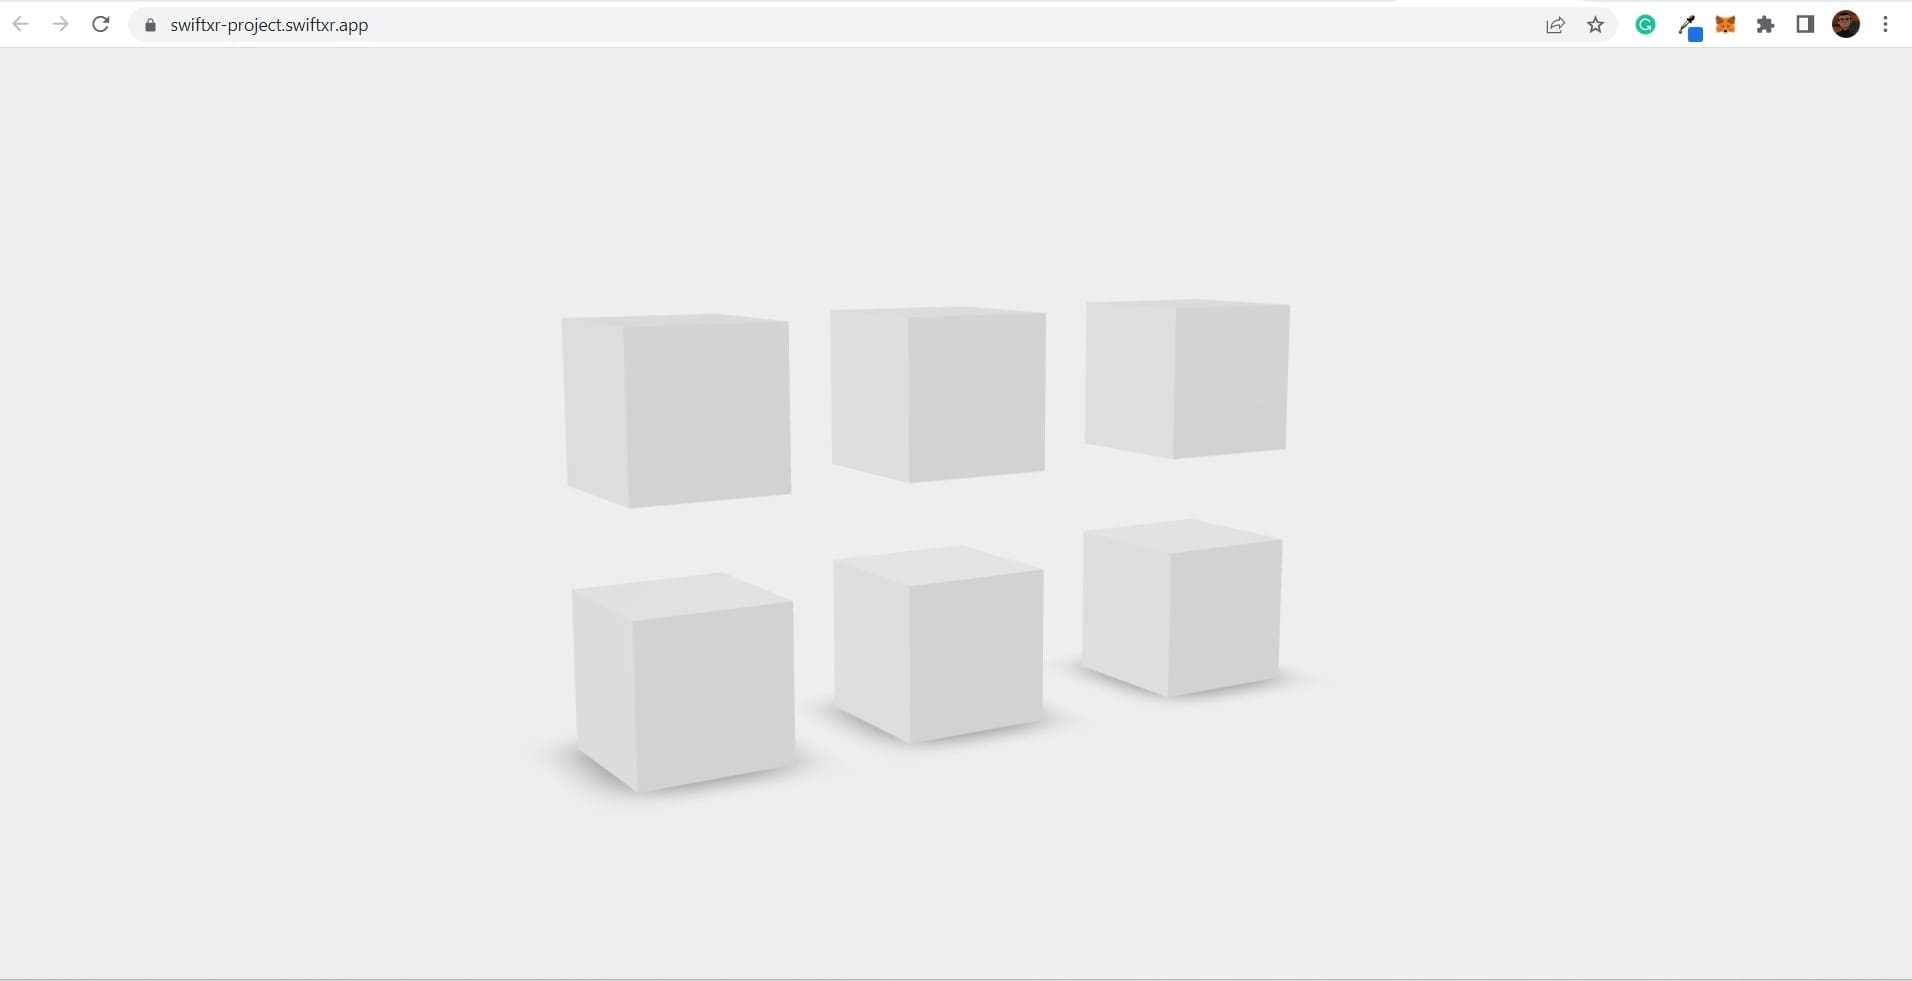
### Viewing your Scene in the Web and AR
Once your project has been successfully exported, SwiftXR will automatically open a URL for your project. You can share this URL with others to view your 3D scene in the web or augmented reality (if you selected the AR export mode).
### Conclusion
With the SwiftXR (3D/AR/VR) Add-On for Blender, you can quickly and easily export your 3D scenes for use on the web and in AR, bringing your designs and creations to life in an interactive and immersive format. If you encounter any issues, be sure to send an email to or visit our [discord page](https://discord.gg/hT3zuJgQAw) for live support.
---
# Agent Instructions
This documentation is published with GitBook. GitBook is the documentation platform designed so that both humans and AI agents can read, navigate, and reason over technical content effectively. Learn more at gitbook.com.
## Querying This Documentation
If you need additional information that is not directly available in this page, you can query the documentation dynamically by asking a question.
Perform an HTTP GET request on the current page URL with the `ask` query parameter, and the optional `goal` query parameter:
```
GET https://guide.swiftxr.io/plugins/blender/version-4.2-or-above.md?ask=&goal=
```
`ask` is the immediate question: it should be specific, self-contained, and written in natural language.
`goal` is optional and describes the broader end goal you are ultimately trying to accomplish on behalf of the user. GitBook uses it to tailor the answer towards what is most useful for that goal.
The response will contain a direct answer to the question and relevant excerpts and sources from the documentation.
Use this mechanism when the answer is not explicitly present in the current page, you need clarification or additional context, or you want to retrieve related documentation sections.